Monday, February 28, 2011

Thick and Chewy Chocolate

Chocolate - Thick and Chewy Chocolate Butterscotch Chip Cookie


These Thick and Chewy Chocolate Butterscotch Chip Cookies are destined to become your favorite cookie. A twist on the traditional chocolate chip cookies, these oversized cookies are exploding with chocolate and butterscotch chips. Thick from the edge to the center, chewy and soft. Serve warm from the oven with a cold glass of milk!
Thick and Chewy Chocolate Butterscotch Chip Cookies
Printer Friendly Version
Ingredients:
  • 2 cups plus 2 Tbsp all-purpose flour
  • 1/2 tsp baking soda
  • 1/2 tsp salt
  • 12 Tbsp (1 1/2 sticks) unsalted butter, melted & cooled until warm
  • 1 c brown sugar, packed
  • 1/2 c granulated sugar
  • 1 large egg plus 1 yolk
  • 2 tsp vanilla extract
  • 3/4 cup semisweet chocolate chips
  • 3/4 cup butterscotch chips
Directions:
  1. Preheat oven to 325°F. Line 2 baking sheets with parchment paper; set aside.
  2. In a medium bowl, whisk together flour, baking soda and salt; set aside.
  3. In the bowl of a stand mixer fitted with the paddle attachment, beat butter and sugars until thoroughly combined. Beat in egg, yolk and vanilla until combined. Add dry ingredients and beat at low speed just until combined. Stir in chips.
  4. Roll a scant 1/4 cup dough into ball. Holding dough ball in fingertips of both hands, pull into 2 equal halves. Rotate halves 90 degrees and, with jagged surfaces facing up, join halves back together into one ball so that the top surface is jagged. Place onto prepared cookie sheet, spacing 2 1/2 inches apart.
  5. Bake until cookies are light golden brown, outer edges start to harden, and  centers are still soft and puffy, about 15 to 18 minutes, rotating the baking sheets front to back and top to bottom halfway through the baking time. Cool the cookies on the baking sheets. Remove cookies using a wide metal spatula. Store in an airtight container at room temperature.
Source: adapted from The New Best Recipe


Chocolate Mini Turkey Tart

How To Make Chocolate Filled Mini Turkey Tarts

 There s something magical about desserts that look like they took an eternity to make, but really don t. This recipe can be whipped up in less than 15 minutes and perfect for kids to lend a hand with — plus it puts to use specialty cookie cutters (like this turkey) that only see the light of day a few times a year!

What You Need
Ingredients
1 recipe pie dough (we won t tell if you use store bought, it works fine)
1 bag chocolate chips (peanut butter and butterscotch are great too!)
1 egg
sanding sugar
Equipment
1 pastry brush
cookie cutters of choice
parchment paper
baking sheet
small bowl
Instructions
1. Gather & Pre-Heat: This recipe is rather assembly line in nature, so having all your ingredients ready to go makes things infinitely easier. Pre-heat your oven to 375 degrees to get things going.
2. Whisk Egg: Mix 1 whole egg in a small bowl until combined. Set aside, but not too far from your baking sheet so there s less drips!
3. Roll Out Pie Crust: If you re using homemade, your goal is 1/8 of an inch. It doesn t have to be perfect, but as close as possible is always a good thing. If using store bought, unroll or thaw slightly and slip out of the pan onto a lightly floured surface.
4. Cut Your Shapes: You ll need two of everything, so cut as many pieces as possible in even numbers. The smaller your cutter the more you ll end up with, the larger it is, the less you ll end up with (obviously), but remaking extra dough is no big deal once the first batch hits the oven.
5. Place On Baking Sheet: Place 1 layer of dough cut outs on the baking sheet lined with parchment paper. Leave an inch between each (more if it s handmade dough and slightly thicker) piece. Save the tops for a different step.
6. Add Filling: Add a small amount of chocolate chips (say a tablespoon for large ones, less for smaller), making sure to keep them in the center of each shape and keeping them away from the edges.
7. Seal: Using the pastry brush, run a line of egg wash around the outside of the filling on the edge of the pie crust. Place the top piece over it and gently press the edges together. You shouldn t have to press hard as the egg does the work for you, but making sure all the edges touch is imperative to having them come out of the oven without leaks!
8. Wash and Sprinkle: Go over the top of each tart with your egg wash and gently sprinkle with granulated sugar or sanding sugar of your choice.
9. Bake: Allow tarts to bake for 10-15 minutes (depending on size) or until golden brown. Allow to cool on parchment paper before transferring to a cooling rack (though the entire sheet of parchment paper can be moved to a rack to reuse the pan for the next batch).
Additional Notes:
You can use almost anything as filling so if you re running low on chocolate chips (or chips of any kind for that matter), don t despair and try a little peanut butter and jelly, or even just jelly. Stray bits of candy, marshmallows or even a bit of cheese can get the job done if you re looking for a healthier alternative.
Need Some Help Perfecting Your Pie Crust?
• How To Make Pie Crust From Scratch
• Finishing Touches: How to Get a Perfect Golden Pie Crust
• Trader Joe s Pantry: Trader Joe s Frozen Pie Crusts
Want more smart tutorials for getting things done around the home?
How To Make Chocolate Filled Mini Turkey Tarts


chocolate raspberry cake recipes

Chocolate Recipes - chocolate raspberry cake

Let me get straight to the point and tell you that this is one of my very favorite cake recipes.  It’s chocolate (which scores it several points right off the bat) accented by a delightfully tart raspberry filling.  The layers are moist and rich and the three of them piled up together give it some impressive height.

The cake is a little more complex and the ingredients are a little pricier than the average cake (especially because I always seem to accidentally buy twice as much chocolate as necessary because the original recipe calls for a ganache filling instead of raspberry), but it’s definitely worth it.  Still, I currently only make it once a year for the annual February get-together for the birthday celebration of my mother-in-law and sister-in-law.
Chocolate Raspberry Cake
This year’s family get-together was especially fun with the addition of Jill, an old college friend of my brother-in-law and sister-in-law, and because my niece, Amelia, is now nearly 2 1/2 years old. We don’t get to see Amelia nearly often enough and each time we see her it’s like I’m looking at a whole new person!  She grows and develops new skills so quickly and it’s so cool to see how much she has changed.

I had the great honor of being her guest of honor at many, many tea parties over the course of the weekend.  I don’t hang out with many 2-year olds and was amazed at how happy she was to do the same thing over, and over, and over again.  And over again, and again.  Amelia has such a sparkle in her eye and a laugh that can only make me smile inside and out, so there’s nothing I would have rather done this weekend than sit and sip tea with Amelia, Coco, Baby Duck, Mama Duck, and Owl.  It was a really fun weekend that kept my mind off my upcoming knee surgery and left me feeling renewed and very, very well fed.
Chocolate Raspberry Cake

Double Chocolate Layer Cake

Adapted from Gourmet, March 1999 via Smitten Kitchen
This isn’t a very complicated cake, but there are still a few steps to it.  To make it a little more manageable, I like to make the layers one night, wrap them tightly in plastic wrap and freeze them.  The next day, I make the raspberry filling and ganache and assemble the cake.
For cake layers
3 ounces fine-quality semisweet chocolate such as Callebaut
1 1/2 cups hot brewed coffee
3 cups sugar
2 1/2 cups all-purpose flour
1 1/2 cups unsweetened cocoa powder (not Dutch process)
2 teaspoons baking soda
3/4 teaspoon baking powder
1 1/4 teaspoons salt
3 large eggs
3/4 cup vegetable oil
1 1/2 cups well-shaken buttermilk
3/4 teaspoon vanilla
For ganache frosting
This makes  enough for a very thin layer of frosting.  If you want more frosting, you might want to make an additional half recipe.  It’s a rich cake and I don’t think it needs the extra frosting, but wanted to give you a heads up that it is a thin layer.
8 ounces fine-quality semisweet chocolate such as Callebaut
1/2 cup heavy cream
1 tablespoon sugar
1 tablespoons light corn syrup
2 tablespoons unsalted butter, cut into small pieces
Raspberry Filling
You could probably get away with only making a half recipe, but it’s nice to have extra raspberry puree on hand (and hey, you can slather it right on your cake if you want more raspberry goodness.
2 10-ounce bag frozen raspberries, thawed
1/2 cup sugar
2 tablespoons cornstarch
Special equipment: three 9-inch round cake pans
Make cake layers:
Preheat oven to 300F and butter pans. Line the bottoms with rounds of parchment and butter the paper.
Finely chop the chocolate and place in a medium-sized nonreactive bow.  Pour the hot coffee over the chocolate and let the mixture stand, stirring occasionally, until the chocolate is melted and the mixture is smooth.
In a large bowl sift together sugar, flour, cocoa powder, baking soda, baking powder, and salt. In another large bowl with an electric mixer beat eggs until thickened slightly and lemon colored (about 3 minutes with a standing mixer or 5 minutes with a hand-held mixer). Slowly add the oil, buttermilk, vanilla, and melted chocolate mixture to eggs, beating until combined well. Add the sugar mixture and beat on medium speed until just combined well.
Divide batter between pans and bake in middle of oven until a tester inserted in center comes out clean, 35-45 minutes.
Cool the layers completely in pans on racks. Run a thin knife around edges of pans and invert layers onto racks. Carefully remove parchment paper and cool the layers completely. Cake layers may be made 1 day ahead and kept, wrapped well in plastic wrap, at room temperature, or can be frozen for several days.
Make Raspberry Filling
2 10-ounce bag frozen raspberries, thawed
1/2 cup sugar
2 tablespoons cornstarch
Puree the raspberries in a food processor, blender or immersion blender. Press the puree through a fine-mesh strainer with the back of a spoon, removing the seeds. Heat the puree in a small pot with the sugar and cornstarch until mixture boils, stirring constantly. As it boils, it should thicken quickly.  Let it thicken to about the consistency of cold maple syrup.
Let it cool complete before spreading it over two layers.
Make frosting:
Finely chop the chocolate. In a 1 1/2- to 2-quart saucepan bring cream, sugar, and corn syrup to a boil over moderately low heat, whisking until sugar is dissolved. Remove pan from heat and add chocolate, whisking until chocolate is melted. Cut butter into pieces and add to frosting, whisking until smooth.
Transfer the frosting to a bowl and cool, stirring occasionally, until spreadable (depending on chocolate used, it may be necessary to chill frosting to spreadable consistency). If necessary, you can stir the ganache over a bowl of ice water to cool it off quickly and evenly.
Spread frosting between cake layers and over top and sides. Cake keeps, covered and chilled, 3 days. Bring cake to room temperature before serving.


Chocolate Ginger

Chocolate - Chocolate Ginger


Plain chocolate. Ginger, crystalised (tasty) or stem (heaven).
Wonderful. Addictive. Ahhhhh….


CRYSTALISED GINGER
Costiness: £2.47 for 250g from A Quarter Of


STEM GINGER
Costiness: £3.10 for 250g or £29.99 for the whole 3kg jar


Sunday, February 27, 2011

Chocolate Boule

Cranberry Chocolate Banana Sourdough Boule


My son has been begging for banana bread.  I have been obsessed with sourdough boules.  So I found the recipe for Cranberry Chocolate Sourdough on SourdoughHome.  As you can already guess, I decided to make it, adding the bananas.  It was a mixing nightmare, super elastic dough, smushy bananas & boiled cranberries refusing to be mixed in.  So I just kind of squished it together and over 3 hours attempted some S&F's.  After 3 hours it finally relaxed & I was able to shape it into a kind of boule and bake it.  Pictured are the results.  I thought for sure I'd made another flop, but we all like it, weird as it is.


Chocolate White Ginger flavored

White Chocolate Ginger flavored Panna Cotta and Florentine Cookies for Daring Bakers

I made Panna Cotta, the typical Italian dessert, before. So the February challenge of Daring Bakers was quite easy for me. The Florentine cookies, which by the way I know only with nuts and candied fruits, were a bit of a challenge. Like some other Daring Bakers I ended up with huge cookies. Fortunately still delicious!

For the Panna Cotta I used a ginger flavored white chocolate I recently received for a secret chocolate test. Very yummy! Instead of filling the cookies with chocolate I sprinkled some over the white Panna Cotta, so at least it visible on the white plate. ;-)

White Chocolate Ginger flavored Panna Cotta and Florentine Cookies for Daring Bakers
For the recipe please head over to the Daring Kitchen Headquarter. There you will also find all the Panna Cotta and Florentine Cookies my fellow Daring Bakers made.
The February 2011 Daring Bakers challenge was hosted by Mallory from A Sofa in the Kitchen. She chose to challenge everyone to make Panna Cotta from a Giada De Laurentiis recipe and Nestle Florentine Cookies.


Chocolate Cakelet


Recipe: Fudgy Chocolate Cakelets with a Pinch of Glamour


Recipe Fudgy Chocolate Cakelets with a Pinch of Glamour Recipe: Fudgy Chocolate Cakelets with a Pinch of GlamourRecipe: Fudgy Chocolate Cakelets with a Pinch of Glamour
The 83rd Academy Awards take place this Sunday night, a feast of movie glitterati and glamour for those of us who enjoy such things. Are you planning to throw an Oscars bash, complete with red carpet? If so, then you should definitely include these little starlets — easy fudgy chocolate cakes all dressed up with a pinch of glamour.
Underneath their red gowns and sparkling glitter, these little cakes are quite ordinary. They are mixed up in a pan like my favorite brownie recipe, and they take all of 5 minutes (truly!) to mix up. In fact, the last time I made these I whipped them up while idly waiting for overdue guests. They are stress-free and completely reliable.
But dress them up a bit and wow! They can make quite an entrance. See, these aren t just ordinary brownies or chocolate cake. They are extra-dense, and extra-fudgy. They aren t exactly flourless cake or those hot molten lava cakes either. They can be baked in liners and passed around at a party. But if you serve them warm then oh, that first bite just melts in your mouth, like the best performance butter and chocolate can make together.
These aren t terribly sweet. I like to lighten the taste with just a swirl of lightly sweetened whipped cream and, if you are so inclined, a scattering of edible gold stars.
Fudgy Chocolate Cakelets
makes 6 cakelets
3 ounces semi-sweet chocolate
1/2 cup unsalted butter
1/2 cup brown sugar
1/4 cup white sugar
1 teaspoon vanilla
1 tablespoon bourbon (optional)
1/4 teaspoon salt
2 eggs
1/4 cup cocoa powder
1/4 cup cake flour
Heat the oven to 325°F and line 6 wells in a muffin pan with paper liners. Lightly spray the liners with baking spray.
Place the chocolate and butter in a 1-quart saucepan over medium heat. Melt the butter and chocolate, stirring frequently. As soon as both are completely melted, turn off the heat. Stir in the brown sugar and white sugar, as well as the vanilla, bourbon, and salt. Stir in both eggs, and the cocoa powder and cake flour.
Divide the batter evenly among the 6 cupcake liners. Bake for 18 to 20 minutes, or until the middles of the cakelets are just barely set.
Serve warm with a touch of whipped cream and razzle-dazzle sprinkles, if so desired.

Sunday, February 20, 2011

Chocolate Indonesia

Chocolate Fudge Muffins


Because of the fudge they can come out quite sweet, so definitely one for the dessertaholics amongst us.
I’ve messed around with this recipe quite a lot. Because it’s so easy to get right, there’s a lot of room for experimentation.
I would normally use chocolate chips in this muffin recipe (white chocolate chips with this are absolutely delicious) but today I thought I’d give it a whack with some fudge. The only problem with the fudge is that it sinks to the bottom of the mix, so you end up with a really sticky bottom and if you don’t turn them out straight away it’s nearly impossible to get them out of the moulds.

This time, I also tried using a mixture of cocoa powder and Galaxy hot chocolate and they turned out great with the resulting muffins really airy and springy. The taste is different, but I think it's a good difference, it's really up to you to experiment and see what you like best.
You’ll need to prepare a tin with 12 large muffin cases, or around 15 - 20 medium sized muffins cases.

Preheat the oven to 170 degrees C.
You Will Need:
- 2 large eggs
- 200g caster sugar
- 130g plain flour
- 50g cocoa powder (I used 25g cocoa powder, 25g Galaxy hot chocolate)
- 160g unsalted butter, melted
- 2 teaspoons baking powder
- 160ml whole milk
- Vanilla extract
- 100g fudge (or 100g chocolate chips, depending on what you're trying)
The Method:
1. Put the eggs and the sugar in a bowl and mix them together until you get a light pale mixture.
N.B. You'll note that if you leave it for a minute or so while you're measuring other ingredients that it's gone a bit frothy - this is just the sugar, so give it another quick mix before adding anything else.
2. Put the flour, baking powder and cocoa powder into a bowl and mix it all together.
3. Add the vanilla extract to the milk and mix it together.
4. Put some of the cocoa mixture into the sugar and egg mix and stir it together until it's well mixed.
5. Then add some of the milk and vanilla and mix it through until it's well incorporated.
6. Repeat these two steps until you've added all the cocoa powder mixture and all the milk.
Quickly beat it for a few minutes until it's all completely mixed together.
7. Now, add in the melted butter and stir it into the mix until it's combined.
8. Finally add in the fudge (or chocolate chips) and stir them in by hand to make sure they are spread evenly throughout the mixture.
N.B. Don't be concerned if the mixture seems quite more liquid than you expected, this is exactly how it's supposed to be at this stage, so don't add more flour or cocoa powder or you won't get the lovely muffiny texture.
9. Spoon the mix into muffins cases, or mould, until they're just over two thirds full to allow for rising.
You then need to bake them in the oven for 30 minutes.
To check that they're done, stick a knife into the middle, if it comes out clean, then they're ready. If you're using silicone moulds then they will be coming away from the sides.
10. Turn then out as soon as you can and leave them to cool on a wire rack.
Once they're cool, you'll need to keep them in a tin to make sure they stay moist and muffiny, and don't dry out and get chewy.


chocolate Indonesia

Honey Chocolate Cupcakes with Honey Ganache

Honey+Cupcake Honey Chocolate Cupcakes with Honey Ganache

Everyone needs a good basic chocolate cupcake recipe in their repertoire. I made these recently when working through the last of a bucket of honey that was taking up altogether too much shelf space; they’re simple and not too intense, and I love that the truffle-like frosting uses honey as well. Ganache is just a fancy word for chocolate melted with cream, and in this case, honey. It’s the same mixture you’d use to make truffles, only more liquidy, so you can easily dribble it over your cupcakes and let it firm up as it cools. Ganache is actually easier to make than regular buttercream frosting, and far more decadent – in my books, anyway. Plus it sounds good. If you like, add a candy or sprinkles on top before the ganache sets.

Honey Chocolate Cupcakes with Honey Ganache
Cupcakes:

2 1/4 cups flour
1/2 cup sugar

1/2 cup cocoa

1 tsp. baking powder
1/2 tsp. baking soda

1/4 tsp. salt
1 1/2 cups buttermilk or thin plain yogurt
1/2 cup canola oil

1/2 cup liquid honey

2 large eggs

2 tsp. vanilla
Ganache:
1/2 cup whipping cream or half & half

1/2 cup honey
8 oz. (8 squares) semi-sweet chocolate, chopped
 

Preheat oven to 350°F. Line a muffin tin with paper liners, or spray it with nonstick spray.
In a large bowl, whisk together the flour, sugar, cocoa, baking powder, baking soda and salt. In a medium bowl, whisk together the buttermilk, canola oil, honey, eggs and vanilla. Add to the dry ingredients and whisk just until combined.
Fill the lined muffin tins 3/4 full and bake for 20-25 minutes, or until tops are springy to the touch. Repeat with remaining batter. Set on a wire rack to cool.
To make ganache, combine whipping cream and honey in a small saucepan and set over medium heat until it begins to simmer around the edges. Remove from heat and stir in the chocolate. Let sit for a few minutes, and then stir until smooth. Set aside to cool for about 5 minutes before pouring over cooled cupcakes. If you like, top each cupcake with a candy or raspberry before the ganache sets.
Makes about 20 cupcakes.


Chocolate Indonesia

White Chocolate-Raspberry Cheesecake

Velvety smooth white chocolate cheesecake, in a chocolate crust and topped with raspberries! You’ve been warned – this cheesecake is VERY addictive.

Ingredients

  • FOR THE CRUST:
  • 2 cups Chocolate Cookie Crumbs, Like Oreos
  • ¼ cups Butter, Melted
  • _____
  • FOR THE FILLING:
  • 1 package White Chocolate Chips (11 Oz. Package)
  • ½ cups Half-and-half
  • 2 packages Cream Cheese (8 Oz Each)
  • 3 whole Eggs
  • _____
  • FOR THE TOPPING:
  • 1 can Raspberry Pie Filling (21 Oz.)

Preparation Instructions

Preheat oven to 325 degrees F. If making homemade pie crust, melt butter in microwave, heating 30 seconds at a time until melted. Crush cookies in a bag with a rolling pin, or in a blender. Mix together cookies and melted butter. Press the crust mixture on the bottom and up the sides of a pie pan or a cheesecake pan.
Using a medium sized saucepan, fill it 1/4 of the way full with water, bring to a boil. Melt white chocolate chips and half and half in a glass bowl sitting above the saucepan. DO NOT let the water touch the bowl. (You can also use a double boiler for this – you are basically heating and melting the mixture using the steam. Or I suppose you could also melt the chocolate and half and half in the microwave – it’s probably easier. If you use the microwave, just make sure to only heat for 30 seconds at a time, stirring in between each heating, and making sure to stop once it’s melted or you’ll scorch the chocolate).
In a separate bowl, blend soft cream cheese with eggs. To make sure there are no lumps, you could use a blender.
Temper the egg mixture by spooning a small amount of the melted white chocolate into the cream cheese mixture. Slowly pour the rest of the white chocolate into the cream cheese mixture and stir to mix. Pour this mixture into pie crust.
For baking the cheesecake, I’d recommend a bain-marie (water bath). In an tall sided pan (one that is big enough to hold your pie pan), fill 1/4 or 1/3 full with hot water (just make sure you don’t put in so much that it will go over the sides of the pie pan when you put it in). Cover bottom and edges of your pie pan with foil. Place in center of bain-marie pan and bake.
Bake for 40-60 minutes, until set. Cool the cheesecake and when ready to serve, cover with raspberry filling.


Tuesday, February 8, 2011

Sweet and simple for your Valentine

Easy chocolate desserts fit for every cooking skill


There’s something fun, something sexy, something luscious about chocolate. So head to the kitchen and stir something up for Valentine’s Day.

What, you’re afraid of a chunk of chocolate? Messed up too much of the sweet dark stuff?

Join the club. Most every cook has watched melting chocolate seize up — that dramatic shift from creamy to stiff glob — when a drop of water hits it. Even Rozanne Gold.

Gold is the chef and award-winning author of almost a dozen cookbooks, including her most recent, “Radically Simple.”

She knows that moment well: “It’s horrifying,” she said. “Sometimes I’ll add a touch of cold butter or a little splash of cream,” then heat gently until all’s well.

Because she’s not a pastry chef, Gold said, “I tend to keep my desserts very simple.”

A favorite dessert? “Really good chocolate, 62 percent (cacao content) or even more bitter, with shards of Parmigiano-Reggiano, and red grapes,” she said. “Each taste and flavor of one affects the taste of the other, and it’s just like this wonderful little taste experience.”

The good thing about chocolate? “If it gets messed up somehow,” she counsels, “it’s still going to taste good.”

So, whatever your cooking skills, whatever your age, make something chocolate for dessert, utterly simple, a bit complex. Enjoy.

Melting chocolate

Here are a few tips from Carole Bloom’s “Intensely Chocolate.”

Don’t rush chocolate melting. Try to rush it and you can ruin it.

Once melted, chocolate can stand at room temperature about 15 minutes; stir occasionally to prevent skin from forming.

Milk chocolate and white chocolate are delicate and can burn easily; use very low heat when melting. Stir frequently.

To keep chocolate from seizing, be sure utensils that come in contact with chocolate are completely dry. A stray drop or two of liquid will cause chocolate to seize into a stiff and grainy mass.

Easy Chocolate Parfait

Prep: 15 minutes Cook: 15 minutes Makes: 4 parfaits

1 package (3.9 ounces) chocolate pudding

½ pint (1 cup) whipping cream

4 cookies (Oreos, chocolate chip, etc.), coarsely crumbled

Fresh raspberries

1. Make pudding according to package directions; set aside to cool. Whip the cream to stiff peaks.

2. Put 1 tablespoon of cookie crumbs in bottom of each of four clear stemmed dishes or glasses. Add a spoonful of chocolate pudding, then a spoonful of whipped cream and a layer of raspberries. Continue layering. Finish with whipped cream and a raspberry garnish.

Nutrition information: Per serving: 365 calories, 61 percent of calories from fat, 25 g fat, 15 g saturated fat, 82 mg cholesterol, 34 g carbohydrates, 2 g protein, 476 mg sodium, 1 g fiber.

All-chocolate Velvet Tart

Prep: 25 minutes Cook: 20 minutes Chill: 1½ hours Makes: 10 servings

Adapted from Rozanne Gold’s cookbook, “Radically Simple.” Creme fraiche is a tart garnish; use unsweetened whipped cream for a milder flavor.

5 ounces chocolate graham crackers or chocolate wafer cookies

5 tablespoons unsalted butter, room temperature

1 cup whipping cream

12 ounces semisweet chocolate, chopped

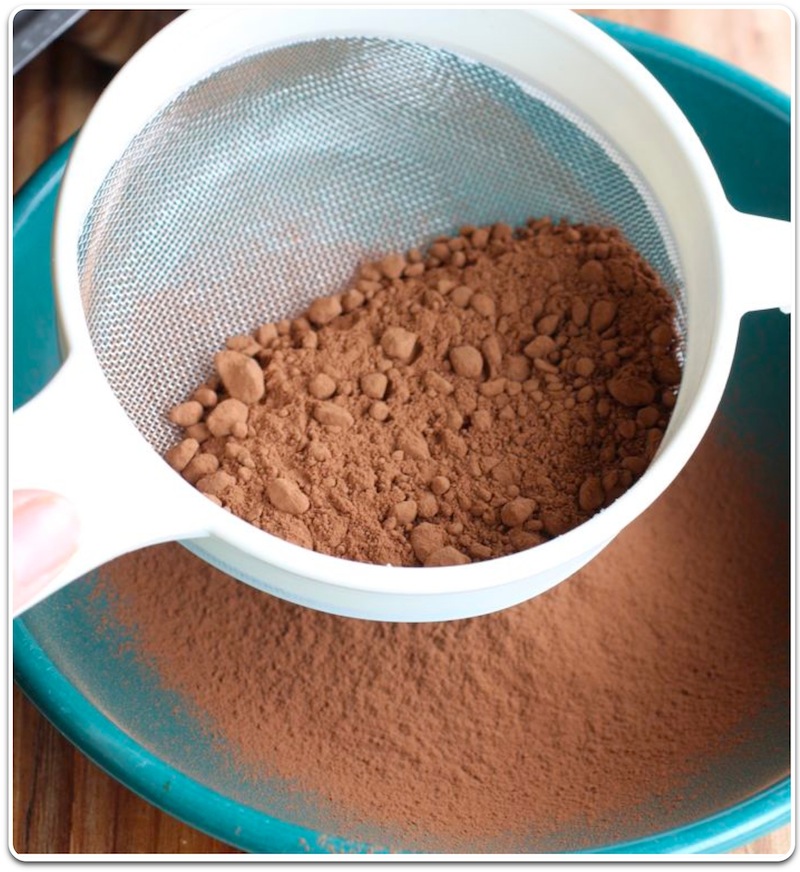
2 tablespoons unsweetened cocoa

1 tablespoon creme de cassis or 1 teaspoon grated orange zest

1 cup creme fraiche

1. Heat oven to 350 degrees. Combine graham crackers and 4 tablespoons of the butter in food processor; process until finely ground. Pack crumbs evenly into a buttered 9-inch fluted tart pan with removable bottom. Bake 10 minutes.

2. Heat cream just to a boil in a saucepan. Reduce heat; simmer 5 minutes. Add chocolate; stir constantly over low heat until melted. Stir in cocoa, cassis and remaining 1 tablespoon of the butter until smooth. Pour into crumb crust; refrigerate 1½ hours or until firm. Serve with creme fraiche.

Nutrition information: Per serving: 404 calories, 63 percent of calories from fat, 30 g fat, 18 g saturated fat, 58 mg cholesterol, 35 g carbohydrates, 5 g protein, 111 mg sodium, 3 g fiber.

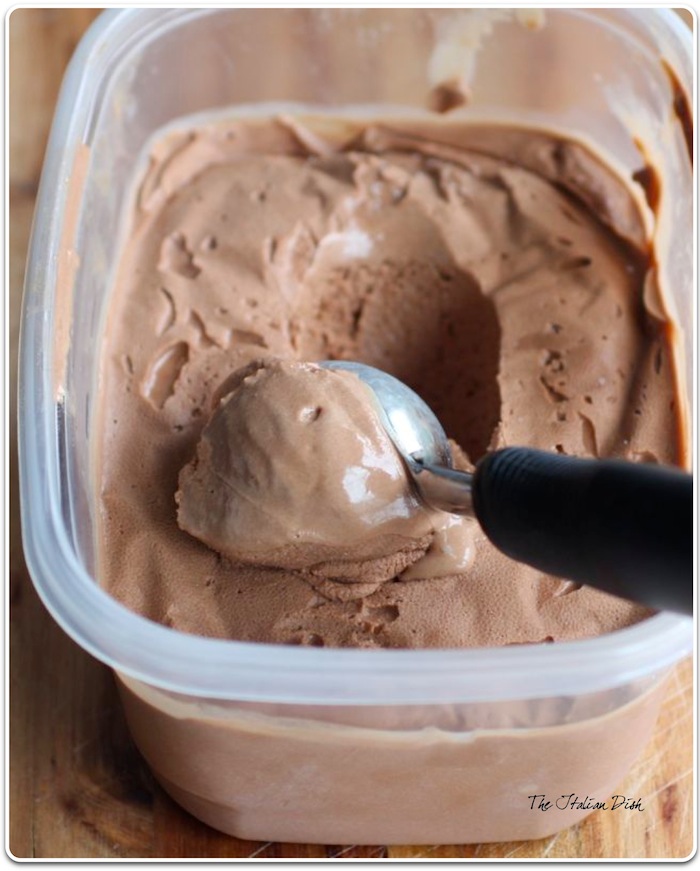
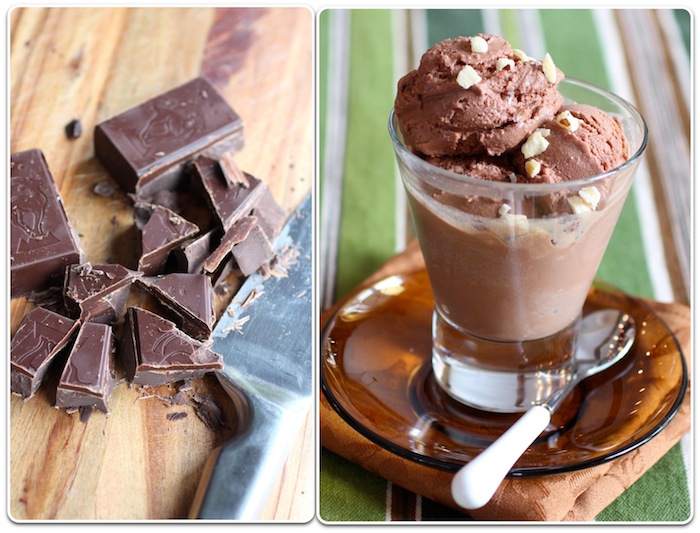
Bittersweet Chocolate-caramel Mousse

Prep: 25 minutes Cook: 12 minutes Chill: 2 hours Makes: 10 servings

Adapted from Carole Bloom’s “Intensely Chocolate.”

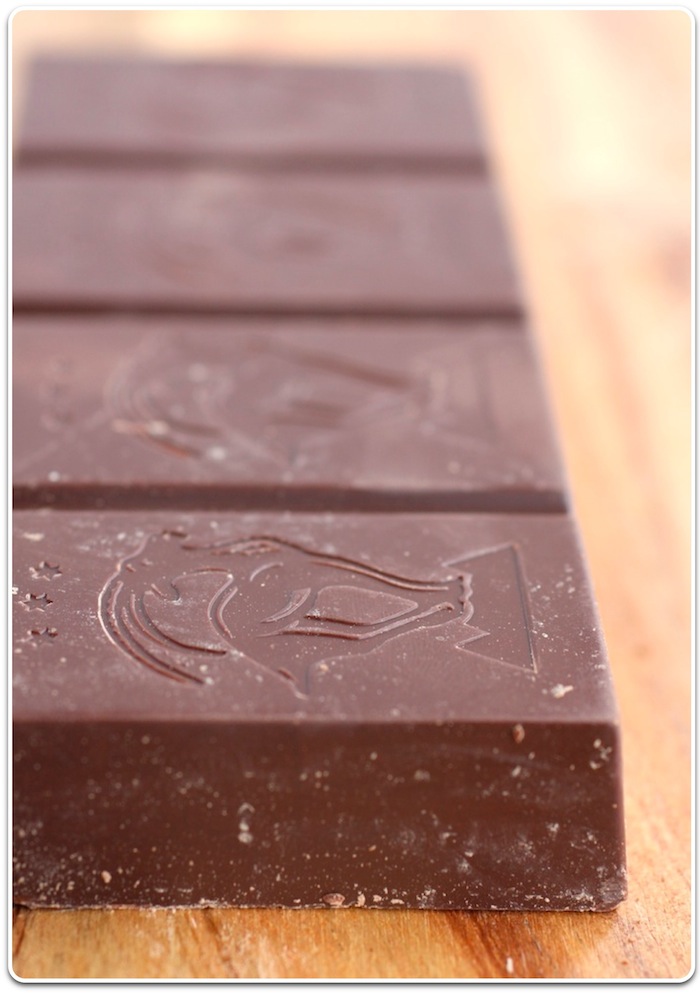
4 ounces bittersweet chocolate (66-72 percent cacao content)

½ cup each: granulated sugar, light brown sugar

¼ cup water

2 teaspoons honey

1 teaspoon vanilla bean paste

2 cups whipping cream

½ stick (¼ cup) 4 tablespoons (½ stick) unsalted butter, softened

1. Melt bittersweet chocolate in a microwave-safe bowl on low power in 30-second bursts, stirring after each burst. Set aside, stirring occasionally.

2. Combine granulated sugar, brown sugar, water, honey and vanilla paste in a heavy 3-quart saucepan. Cook over high heat until mixture comes to a boil. To prevent crystallization, dip a pastry brush in water and run it around inside of pan where mixture meets the pan; repeat. Cook without stirring until it turns amber, 6-8 minutes.

3. Meanwhile, heat 2/3 cup of the whipping cream to a boil over medium heat. Slowly add hot cream to caramel mixture, stirring constantly with a long-handled heat-safe silicone spatula. Be careful; mixture will bubble and foam. Remove saucepan from heat. Stir in butter until completely melted; stir in melted chocolate thoroughly. Transfer mixture to a heat-safe bowl. Cover with plastic w rap. Place on a rack; cool to room temperature.

4. Whip remaining 1/3 cups whipping cream to soft peaks. Reserve ½-cup whipped cream for garnish. Fold remaining whipped cream into chocolate mixture in three stages, blending thoroughly. Divide mousse among dessert bowls or glasses, or pour into a 1½-quart bowl. Cover with plastic wrap; chill until set, about 2 hours. Garnish with remaining whipped cream.

Nutrition information: Per serving: 346 calories, 67 percent of calories from fat, 27 g fat, 16 g saturated fat, 78 mg cholesterol, 29 g carbohydrates, 2 g protein, 22 mg sodium, 1 g fiber.

Bittersweet chocolate meets caramel

Pastry chef and confectioner Carole Bloom’s newest book, “Intensely Chocolate: 100 Scrumptious Recipes for True Chocolate Lovers,” boasts a quartet of mousse recipes.

It’s also thick with tips on working with chocolate and closes with a glossary packed with “chocolate” terms, from amelonado (a type of cacao from the Amazon) to winnowing (a process that frees the inner nib from a cacao bean’s husks).

Chocolate Gelato

Chocolate Gelato


We make ice cream at home quite a lot and I've posted several ice cream recipes in the past. But I get asked enough about how to make gelato that I thought it was time for a post.

The big question for people is what is the difference between American ice cream and Italian gelato? When people taste gelato, they comment on the intensity of flavor and the different texture it has. Gelato is very dense and this is because there is not the amount of air whipped into it like American ice cream. Ice cream has a lot of air whipped into it and it makes for a lighter texture. Ice cream is also made from cream and sometimes eggs and has quite a bit of butterfat. Gelato has much less butterfat and is made from milk.

The question is - can you make gelato at home? I don't think that you're ever going to replicate the incredible gelato that you can get at a really good gelateria but you certainly can make a very delicious gelato at home. There are many different recipes for homemade gelato and you can have a lot of fun trying different ones to see which you like. You do need to have an ice cream maker. We have a Cuisinart ice cream maker, which is very popular. Lots of people have these and probably even more have them stored way in the back of some cupboard and never use it. But if you haven't tried homemade ice cream yet then break out your ice cream maker and see how easy this gelato is.

I'm giving you two different recipes here. One is from A16, the terrific Italian restaurant in San Francisco. Many gelato makers add liquid glucose and liquid dextrose to their gelato because these kind of sugars prevent ice crystals from forming. In this recipe, Jane Tseng, who makes the desserts at A16, adds light corn syrup, which is a good substitute.

One recipe uses unsweetened cocoa powder and one uses melted bittersweet chocolate. The tastes are slightly different (my husband prefers the cocoa powder) and you'll just have to make two batches at two different times to decide which you prefer!

Gelato at a real gelateria is kept in special freezers so it does not freeze hard. You obviously won't be able to do this at home, so just take the gelato out 10-15 minutes before you plan to serve it.

Chocolate Gelato

for a printable recipe, click here

adapted from A-16

1 quart whole milk
1 tablespoon plus 1-1/2 teaspoons cornstarch
1/2 cup light corn syrup
1/3 cup sugar
1/2 teaspoon kosher salt
8 ounces bittersweet chocolate (about 70 percent cocoa)
1 teaspoon vanilla extract

Place 2 tablespoons of the milk in a small bowl. Whisk in the cornstarch to make a slurry and set aside.

In a pot, add the remaining milk and bring to a boil over medium heat. Whisk in the slurry, corn syrup, sugar and salt. Return the mixture to a boil and whisk in the chocolate until completely smooth. Transfer into a bowl and let cool to room temperature. Once cooled, stir in the vanilla extract. Cover and refrigerate for at least 3 hours or preferably overnight to make sure it is completely chilled.

Whisk the base and then pour it into your ice cream maker and churn. The gelato should be the consistency of soft-serve ice cream. You don't need to churn it as long as you do ice cream - you want it to just be a custard sort of consistency, not completely frozen. Store in a chilled container in the freezer, with plastic wrap pressed onto the top.

(After the gelato has been in the freezer for a day, take it out about 10 minutes before ready to serve to let it soften up).

Gelato Siciliano

from Saveur

serves 6-8

3 cups milk
3/4 cup sugar
2 tbsp. cornstarch
3/4 cup unsweetened cocoa (I sift the cocoa to remove any lumps)

Bring 2 cups of milk to a simmer in a medium saucepan over medium heat; remove from heat. Meanwhile, combine 1 cup milk with sugar, cornstarch and cocoa in a bowl and stir into hot milk. Cook until sugar and cocoa dissolve. Allow to cool, then cover with plastic and refrigerate overnight. Process mixture in an ice cream maker. You don't need to churn it as long as you do ice cream - you want it to just be a custard sort of consistency, not completely frozen.Store in the freezer in a container with plastic wrap pressed right on top. It's best the day you make it. If it freezes hard, just remove it 10 minutes before you plan of serving it.

Chocolate Maya

Chocolate Maya from Chocolat

DSC 0009 21 300x201 Chocolate Maya from ChocolatDo you remember the movie Chocolat with Juliette Binoche and Johnny Depp? Before it was a movie it was also a great book. I own both the paperback and DVD versions of the story. Once a year I read the book and three times a year I watch the movie. Yes, I am obsessed with Johnny Depp, but I am also obsessed with the chocolate. In the movie there are so many scenes showcasing incredible chocolate foods and recipes that I swear you could get a cavity just from watching! One of my favorite scenes in the movie, besides when Alfred Molina wakes up in the window of chocolate, is when Maya makes a rich, spicy hot chocolate for a customer. It looks so decadent I am sure even I could only handle one or two sips, but I dream of it nevertheless. This dream got the better of me during a recent snowstorm so I researched Chocolate Maya and came up with this recipe. It is spicy and dense to be sure, but has some many complex flavors you are able to drink it sip by sip over the course of an afternoon.

Chocolate Maya

based on the movie Chocolat and a recipe from the Phoenix Sun Times

2 cups water

1 red chile pepper, cut in half and deseeded

5 cups 2% milk

1 vanilla bean, split lengthwise

1 teaspoon ground cinnamon

8 ounces bittersweet chocolate

2 tablespoons honey

Whipped cream

Bring water to a boil in a small saucepan. Add the chile and boil until the liquid has reduced by half. Remove from heat and set aside.

In a large saucepan over medium heat warm the milk, vanilla bean and cinnamon until bubbles begin to form around the edge. Reduce the heat and add in the chocolate and honey and stir until everything is dissolved. Turn off the heat and remove the vanilla bean. Then stir in the chile water until everything is combined.

Monday, February 7, 2011

chocolate | National Chocolate Month

Valentine’s Day is coming soon! Think chocolate… a beautiful box of chocolates!


Vintage ad – 1908 – for New England Confectionary Company of Boston, Massachusetts chocolates and other sweets.

Whether it’s – Godiva, Hershey, Mrs. Nelson’s, Lindt, Nestles’s, Ghiradelli, Ferrero Rocher, Priscilla’s, Harbor Sweets, Whitman, Russell Stover or Dove – whatever your favorite confectionery brand – February is National Chocolate Month – time to celebrate. It comes as dark chocolate, milk chocolate, chocolate mixed with fruit and with nuts – chocolate with creamy filling, chocolate covering caramels, raisins, nougat, pretzels and cherries. As a pure liquid treat it covers ice cream or frosts cakes, cupcakes, brownies, donuts and cookies. Mixed with milk or cream it delights – whether hot or cold – frothy or foamy. It flavors cereal – cakes, breads, pies, muffins and donuts – and even liquors! It melts in your mouth as a heavenly no fail-fudge made with Lynn, Massachusetts-made Marshmello Fluff. Some firmly believe that chocolate is an aphrodisiac – others that in its darkest and purist form chocolate is actually healthy.

Since we are celebrating chocolate – here a few more positives about chocolate:

* The smell of chocolate may increase theta brain waves, resulting in relaxation.
* Chocolate contains phenyl ethylamine, a mild mood elevator.
* The cocoa butter in chocolate contains oleic acid, a mono-unsaturated fat which may raise good cholesterol.
* Drinking a cup of hot chocolate before meals may actually diminish appetite.
* Men who eat chocolate live a year longer than those who don’t.
* The flavanoids in chocolate may help keep blood vessels elastic.
* Chocolate increases antioxidant levels in the blood.
* The carbohydrates in chocolate raise serotonin levels in the brain, resulting in a sense of well-being.

Valentine’s Day is coming soon! Think chocolate… a beautiful box of chocolates!

chocolate | white chocolate nut cookies

White Chocolate Macadamia Nut Cookies


Baking perfectly thin and crispy cookies is an art in itself also to accomplish that whenever the baker is acquiring ready to follow some scientific observations and methods the effect is bound to the ideal. With regards to baking white chocolate macadamia nut cookies that are absolutely everyones favorite the measurements and handling with the ingredients is significant.

The end result is significantly affected by the different methods undertaken to follow along with the recipe taking place. The number of the science that adopts it makes or breaks your time and effort. The normal errors have to be avoided while baking the white chocolate macadamia nut cookies. The approach towards the recipe should be relative to it otherwise the outcomes can be quite upsetting. A option of the most effective style of flour to your baking is critical due to the fact as the all purpose flour is among the most standard option the lesser protein containing variants like bread and cake flour make for chewy cookies which several people like to have.
For anybody who is making eggless cookies then additional level of milk is needed meaning the batter is going to be of thinner consistency. Using whole eggs would be the standard and standard way producing a well-balanced sort of batter with the cookie while the yolks only make certain it really is chewier. Now it might be understood that if only the egg white is taken the thin number of white chocolate macadamia nut cookies leave the oven.

Within the event the batter is made with the butter being put into it for your cookies created utilizing sweet and macadamia nuts the butter when utilized in the melted form thick and chewy cookies are created and a couple of individuals even like them too.

The thinner assortment needs to be through with butter employed when cold as then bubbles form from it because the batter is whipped and air fills in result within the cookies lighter. Now the application of white sugar in contrast to brown sugar even provides its scientific reason. The richness in taste is rather a lot affected and if both most of these sugars are now being used the ratio has to be kept a close look on. The brown sugar affords the molasses and thus a butterscotch flavor is obtained which is certainly so widespread in chocolate chip macadamia nut cookies. Though the white sugar gives additional crispy texture and also a refined sugary flavor is achieved.

The role on the leavening agents like baking soda and baking powder is really important for white chocolate macadamia nut cookie to show out crispy. The alkaline property of the baking soda brings about formation of bubbles immediately when combined with the batter and then you've gotten to behave actually fast and bake the white chocolate macadamia nut cookies without delay. The baking powder having said that is milder and leads to much more rise in the event the cookies are baked.

chocolate Mexican

Mexican Chocolate Fondue


Valentine’s Day is right around the corner. Do you have any romantic plans? We love to stay home and treat ourselves to a fancy dinner (with the kids) in our home. Yes, how things have changed since parenthood, but I wouldn’t have it any other way.

My family loves dipping foods, whether it’s chocolate fondue or chips and salsa, because it’s just more fun that way. There’s nothing more fun (and romantic) than dipping luscious strawberries into thick, rich, hot chocolate — Two lusciously sexy flavors when combined.

This recipe makes enough to serve you and your special someone — making this the perfect romantic dessert for two. If you have kids like we do then you might need to double the recipe or make babysitting arrangements.

Ingredients

1/4 cup heavy whipping cream
1 3.3 ounce tablet Mexican chocolate (recommend Ibarra or Abuelita), chopped
1 tablespoon unsalted butter
3 tablespoons unsweetened cocoa powder (optional for thicker chocolate)
1/4 teaspoon vanilla extract
1/4 teaspoon ground cinnamon
2 tablespoons coffee flavored liqueur (recommend Kahlua or Frangelico) (optional)

Dippers

Strawberries
Apples
Mango
Pineapple
Papaya
Star fruit
Banana
Raspberries
Blackberries
Kiwi
Pan dulce
Marshmallows

Directions

Heat 1/2 cup cream in a heavy saucepan over medium heat until cream comes to a low boil. Remove the pan from the heat and add Mexican chocolate. Let chocolate sit in the hot cream 3 to 5 minutes to soften, and then whisk chocolate together with the cream. Stir in butter, cocoa powder (optional), vanilla, cinnamon, and liqueur (optional).

Transfer to a fondue pot; keep warm, stirring occasionally. If fondue becomes too thick, stir in more cream, 1 tablespoon at a time, to desired consistency.

Arrange your favorite dippers around your chocolate fondue with fondue forks or bamboo skewers, for dipping.

We want to thank all of our wonderful Muy Bueno fans by giving away a lovely piece of pottery by Cherie Mahon, a box of Nestle Chocolate Abuelita, along with a recipe card for this Mexican Chocolate Fondue!

TO ENTER:

Leave a comment about your favorite (or not so favorite) Valentine’s Day food or memory below AND please help spread the word by posting on Facebook or Twitter by using the social networking buttons below. We would really appreciate that.

This giveaway ends Monday, February 14th at midnight MST. One lucky winner will be randomly chosen through Random.org. The winner will be notified via e-mail. Winners must respond within 24 hours.

Thursday, February 3, 2011

Chocolate Malt Sandwich

Chocolate Malt Sandwich Cookies for Annie’s Virtual Baby Shower

IMG_0445

One of my favorite bloggers and dear blogger friend, Annie from Annie’s Eats is expecting her second baby in just a few months! I’m so incredibly excited for her and can’t wait to “meet” sweet Caroline! Annie’s Virtual Baby Shower came up just at the right time since I have been absolutely dying to make these chocolate malt sandwich cookies and I knew they would be the perfect addition to an appetizer and dessert shower. I knew our host, Courtney, would be making a cake for the shower so I figured a big plate of chocolaty cookies would be go over well…and I knew that Annie would love them since she’s a huge fan of chocolate desserts and sandwich cookies of all kinds.

The cookies are simple as anything to put together. You make your chocolate malt cookie dough, bake the cookies, and let them cool. Meanwhile, you whip up some chocolate malt filling, chill it for 30 min, whip it up, and fill your cookies. And you’re done! Even better than how simple they are, these are quite possibly the best cookies I’ve ever eaten. And this isn’t just my opinion. The weekend I made them, I had my cousins up for a visit and when two teenagers tell you this was the best cookie they had EVER eaten, you know you’ve got a good thing going. My cousin, Mariah, had been waiting for over a year to make them with me since we first came across the recipe and these cookies fully lived up to every expectation. As expected, they are fantastically chocolaty but the malted milk powder adds an extra layer of depth and flavor to the chocolate that you don’t expect by just looking at them. Not surprisingly, these sandwich cookies went fast. So fast that we made a second batch the following day just so Mariah could take a few of them back to school with her in Providence. I hope they survived the car trip!

IMG_0446

With a long list of fabulous food bloggers attending, you can imagine this shower as one filled with amazing food and great friends, some of whom I’ve been following for years and some of whom you’ve probably been following for years as well! Please be sure to check out Cook Like a Champion and Annie’s Eats for a round-up of this very special baby shower and do yourself a favor by visiting all of the blogs for the recipes and photos – you won’t be at all sorry!

Chocolate-Malt Sandwich Cookies
source: adapted from Martha Stewart, Cookies
Printer-Friendly Version
Yields: 18-20 sandwiches

As with most of the specialty baking items I need, my go-to store is King Arthur Flour and that’s where I purchased the malted milk powder from. If you’re in a pinch and can’t wait a few days for it to be shipped, you can use Ovaltine but you should know that Ovaltine contains cocoa whereas regular malted milk powder does not. For the record, I have not been able to find malted milk powder in any of the grocery stores around me, nor in Whole Foods.

For the cookies: 2 cups plus 2 tablespoons all-purpose flour
1/2 cup unsweetened Dutch-process cocoa powder
1/4 cup plain malted milk powder
1 teaspoon baking soda
1/2 teaspoon coarse salt
1 cup (2 sticks) unsalted butter, room temperature
1 3/4 cups sugar
1 large egg
2 teaspoons pure vanilla extract
1/4 cup sour cream
3 tablespoons hot water

For the filling:

10 ounces semisweet chocolate, coarsely chopped
4 tablespoons (1/2 stick) unsalted butter, cut into small pieces
1 cup plain malted milk powder
3 ounces cream cheese, room temperature
1/4 cup plus 2 tablespoons half-and-half
1 teaspoon pure vanilla extract

To make the cookies:
Preheat oven to 350 degrees.

Sift together flour, cocoa powder, malted milk powder, baking soda, and salt. With an electric mixer, beat butter and sugar on medium-high speed until pale and fluffy. Mix in egg, creme fraiche, and hot water. Reduce speed to low; mix in flour mixture.

Space tablespoon-size balls of dough 3 1/2 inches apart on parchment paper-lined baking sheets. Bake until flat and just firm, 10 to 12 minutes. Let cool on parchment on wire racks.

To make the filling:
While the cookies are baking, melt chocolate and butter in a heatproof bowl set over a pan of simming water, stirring. Let cool. With an electric mixer, beat malted milk powder and cream cheese on medium speed until smooth. Gradually mix in half-and-half, chocolate mixture, and vanilla. Refrigerate, covered, until thick, about 30 minutes. Beat on high speed until fluffy, about 3 minutes. After chilling, the filling will be very thick and dark but as soon as you start to beat it, the color will begin to lighten and the filling will become very fluffy.

To assemble the cookies:
Match up cookies of similar sizes into pairs. Using a tablespoon-size cookie scoop, scoop a heaping tablespoon of the filling onto the bottom of one cookie. Sandwich with another cookie until the filling pushes to the edges of the cookies. Repeat with remaining pairs of cookies. Cookies can be kept at room temperature between layers of parchment in airtight containers up to 3 days. (Though it’s doubtful they will last this long!)

Sweet Valentine Chocolate

Babble Post Roses2 200x300 Sweet Valentine: Chocolate Dipped Strawberry Roses

I’m not a fan of roses. Not in the least. And most especially not on Valentines day. And, yes. Maybe there was that one Valentines day when I begged my sisters to drop major hints to my high school boyfriend that if he sent me a dozen roses wrapped in cheesy supermarket plastic that he might also send me into a fit of horror. I don’t know what it is. Bring me daisies, good shoes, or a box of chocolates and I find myself in love. Bring me roses and I can’t help but cringe. I’m totally weird like that.

With such a rose abhorrence, you’d think I’d be firmly against these Chocolate-Dipped Strawberry Roses the kids and I made this afternoon. But, I found them so ridiculously delightsome that I took one between my teeth and dance around the kitchen like a tango dancer charming a raging bull. It wasn’t a pretty sight, but these pretty little chocolate roses are so simple, and offer such a fresh take on Valentines day gift giving, that I was willing to drop all self-awareness and shake what my mama gave me. I was also willing to drop all animosity toward roses and allow them to charm their way back into my heart.

Babble Post Roses 200x300 Sweet Valentine: Chocolate Dipped Strawberry Roses

Chocolate-Dipped Strawberry Roses

  • 10-15 medium sized strawberries, cleaned and thoroughly dried
  • 10-15 bamboo skewers
  • 1 1/2 cups pink candy melts
  • 1/2 cup red candy melts
  • Small block of styrofoam

In a small, deep bowl, microwave the pink candy melts for 30 seconds, then stir. Melt for 30 seconds and stir again. Continue microwaving for 30 seconds and stirring just until the mixture is fully melted. Heating it in small spurts will keep you from overheating the chocolate, creating a mottled appearance in the final product.

Pull the top, green part of the strawberries up and away from the red fruit. This will keep the greens out of your chocolate, and will also make the greens look more like rose leaves once the strawberries are dipped. Carefully press the sharp edge of a skewer directly into the center part of the strawberry green, press the skewer in just far enough to hold the strawberry . Dip the strawberries into the melted pink chocolate. Turn upside-down and press the sticks upright into the styrofoam, store them here until the chocolate is hardened.

In a small bowl, melt the red candy melts in the same way as you melted the pink candies. Once melted, transfer to a ziptop bag, snip off a small corner of the bag, and pipe up one side of the strawberry and in a spiral on top. Allow to harden once more. Store in the fridge until ready to serve.

Wednesday, February 2, 2011

Hello Kitty Valentine Chocolate

----- Hello Kitty Valentine Chocolate -----

I should know better. Hello Kitty fanatics waste absolutely no time spreading the torture of the upcoming holiday at hand. With the beginning of a new month, I should have known that it was going to be a mistake to open any email that had Hello Kitty and

hello kitty chocolate

hello kitty vanetine's day chocolate
hello kitty white chocolate

All I have to say is that if you open up your Valentine’s Day gift and see that your significant other equates love with the evil feline, just run in the opposite direction as fast as you can. Anything less and you are purposely dooming yourself to a life of Hello Kitty Hell…

Valentine’s Day Cocktails

Godiva Chocolate Infused Vodka – Valentine’s Day Cocktails

Quick post here tonight, to let you know that I’ll be participating in a Girls Night Out Twitter party this evening. For more information about the Twitter party, you can visit the Mom It Forward blog. Join in from 8-10pm CST to find out how Godiva Chocolate and Valentine’s Day can go hand in hand! Plus, you can win a great Godiva Chocolate Giveaway – so head over to Mom it Forward and check it out!

This blogging job is rough, I tell ya’. Sometimes you’ve just got to do things that you just don’t want to do. Like create and taste test Godiva Chocolate truffles and cocktail recipes. I mean, I’ve been cooped up in my house with my four children bouncing off the walls as the snow storm of the century hits our region, and the last thing I would possibly want to do is drink a delicious cocktail. Right? Right? Right….

{A splash of Godiva Chocolate Raspberry Infused Vodka into a Coke or Diet Coke makes a delicious and simply sweet cocktail.}

But, duty calls and as the faithful blogger that I am, I wanted to at least taste the Godiva chocolate vodka before I shared it with you all at Girls Night Out tonight. I’ve had the Godiva Chocolate Liquor before and shared the recipe for Godiva Chocolate Martinis then, but this Godiva Chocolate Infused Vodka and Godiva Raspberry Chocolate Infused Vodka is quite all right. If you want to make the perfect cocktail to celebrate Valentine’s Day with your love (if I were Carrie Bradshaw I’d say “lovah”, but it just doesn’t sound right coming from me) or with your girlfriends to just complain about love, this is the liquor for you!

Whatever your stance on Valentine’s Day, celebrate responsibly (aka please don’t drink and drive and don’t go overboard on the alcohol) and bring some Godiva Chocolate Infused Vodka to your celebration… paired with some rich Godiva chocolate, it is the perfect Valentine’s Day beverage!

{Recipe} Godiva Chocolate a l’Orange (from TheBar.com)

  • 0.75 oz. Godiva Chocolate Infused Vodka
  • 0.25 oz. Grand Marnier
  • 0.75 oz. Godiva Chocolate Liqueur

Pour in a cocktail shaker and shake until well combined. Serve over ice and garnish with an orange peel.

Tuesday, February 1, 2011

Valentine's Day Chocolate Gifts

Unusual Valentine's Day Chocolate Gifts


An assortment of Valentine's Day chocolates. - John Hritz/Wikimedia Commons


A gift of chocolates is a traditional way of expressing love on Valentine’s Day. But if you aren’t satisfied with the familiar heart-shaped box of candy, there are many other creative alternatives available. There are unusual chocolate gifts of all prices and types, and experiences focused on chocolate that can make Valentine’s Day more romantic.

Chocolate Walking Tours

If you’re looking for an experience rather than just giving your lover a box of chocolates, Taste of Chocolate offers chocolate-focused walking tours in Washington, D.C., Boston, and Seattle. There are a variety of tours available in each city, and the locales range from the familiar (Godiva, on the Dupont Circle tour in D.C.) to small local chocolatiers.

Since these tours take place on regularly scheduled days, none are specifically geared towards Valentine’s Day, but the Georgetown tour is the day before and includes one of the most unusual chocolates imaginable- chocolate-dipped bacon lollipops, at the Farmers and Fishers restaurant on the Georgetown waterfront.

Suppliers in Wholesale Wholesale Price from Manufacturers Join Us Today & Inquiry Directly! Made-in-China.com
$1.00 Chocolate Molds Clearance on chocolate molds $1.00 while supplies last! www.getsuckered.com

If you’re in Boston, there’s an Evening of Chocolate & Wine on the 14th. The company also offers a variety of by-reservation private events, including chocolate making workshops and chocolate scavenger hunts. Pricing and reservation information can be found on Taste of Chocolate’s web site.

Spicy Chocolates

If your Valentine prefers something a bit hotter than the standard truffles and crèmes, Harry & David offers the Classic Valentine Rose Bouquet with Moonstruck Chocolates. The bouquet may be traditional, but the chocolate flavors are not: they include Three Spice Caramel, made with jalapeño, chipotle, and cayenne peppers; Spicy Sriracha Truffle, combining chile and ginger with dark chocolate ganache; and Szechuan Truffle, which blends pepper with roasted sesame ganache.

If you’d rather not go the store-bought route, there are numerous recipes for spicy chocolates available online. For example, a post on the Gypsy Chef blog from Feb. 14, 2010 gives suggestions for making spicy chocolate truffles using Lindt chili dark chocolate bars and red peppercorns, and Elizabeth Bau on About.com provides a recipe for “Aztec truffles”, using cayenne pepper along with orange and cinnamon.

Humorous and Cute Chocolates

For the Valentine with a sense of humor, the satirical newspaper The Onion offers its own variation on the heart-shaped tin at its online store. The candy in the box is nothing but ordinary Tootsie Rolls, but the box itself is the attraction rather than the chocolates. The inscription reads, “Please don’t use this holiday to reflect on our relationship and realize you’re better off without me.” (The Onion also offers a flask bearing the words, “I’m like a chocoholic, but for booze.”)

On a slightly less satirical note, the online store My-Funny-Valentine offers a variety of chocolate gift baskets both serious and amusing. So if your Valentine has a weakness for cute stuffed animals, you might want to check out the “Love Doctor” basket, which includes a 16-inch plush dog dressed in a doctor’s uniform along with a wide variety of chocolates. There’s also a gift box with a Valentine’s teddy bear whose feet are embroidered with the words “Kiss me”.

Vegan Chocolates

Finally, if your sweetheart refuses to eat food that contains animal products, Rose City Chocolates offers a variety of vegan chocolate boxes. The company states that not only does has the chocolate been made without any use of animal products, but that “all of the sugar used in making these chocolates is processed from the sugar beet- there are no animal products used in processing or filtering the sugar”.

Rose City has several different packages for these chocolates, including the traditional red heart and a tuxedo velvet heart, along with combinations of boxes and hearts. They also have Valentine’s Day towers along the lines of the ones sold by Harry & David, with stacked boxes of chocolates surrounded by roses.

So if you want to forego the familiar and give your Valentine a less conventional chocolate gift, there are plenty of options for every taste, and opportunities to make the occasion more romantic with the choice of a gift that's individual and unique

Chocolate Cream Pie

Chocolate Cream Pie


A classic pie with rich chocolate filling. Another time-tested recipe that can’t be beat!

  • Prep Time 30 Minutes
  • Cook Time 5 Minutes
  • Difficulty Intermediate

Ingredients

  • 1-½ cup Sugar
  • ½ teaspoons Salt
  • 2-½ Tablespoons Cornstarch
  • 1 Tablespoon Flour
  • 3 cups Milk
  • 3 ounces, weight Chocolate, Semi-Sweet (Chopped)
  • 3 whole Egg Yolks, Slightly Beaten
  • 1 Tablespoon Butter
  • 1-½ teaspoon Vanilla
  • 1 whole Baked Pastry Shell (Pie Crust)
  • _____
  • FOR THE MERINGUE:
  • 3 whole Egg Whites
  • ¼ teaspoons Cream Of Tartar
  • 6 Tablespoons Sugar

Preparation Instructions

Chocolate filling:

Mix in a saucepan the sugar, salt, cornstarch and flour. Stir milk in gradually. Add chopped chocolate. Cook over medium heat, stirring constantly until mixture thickens and boils. Boil 1 minute. Remove from heat. Slowly stir half the mixture into 3 egg yolks, slightly beaten. Then blend the egg mixture back into the saucepan with the remaining hot mixture. Boil 1 minute more, stirring constantly. Blend in butter and vanilla extract. Pour into the baked pastry shell. Top with meringue.

Meringue:

Beat egg whites with cream of tartar until frothy. Gradually beat in sugar, a little at a time. Continue beating until stiff and glossy. Bake 8 – 10 minutes in a 400ºF preheated oven.